Showing posts with label Free Knitting Patterns. Show all posts

Thursday, January 30, 2014

Textured Slouchy Hat - Free Knitting Pattern

Textured Slouchy Hat - Free Knitting Pattern

I created a new version of my slouchy knit hat in response to my son's comment that the original was too "girly". I used a tweedy yarn - Online Linie 245 and a simple textured stitch.

Click here to download a free pdf file of the pattern.


Wednesday, June 13, 2012

My Favorite Free Patterns: Hats to Knit & Crochet

A list, with photos, of my favorite free patterns to knit or crochet hats.There are so many lists of free knit and crochet patterns out there, but they usually don't have photos. So here's a quick list of what I think are the best free patterns out there. Leave me a message below with a link to your favorite if you'd like to add it here.

Easy Slouchy Hat
This is the hat I've knit the most. It can be finished in an afternoon and using variegated yarns make it look much more complicated than it actually is. The pattern is available as a free Ravelry download. It's shown here in Twisted Sister Jazz yarn. I used two colors (60 & 69) and alternated with two rows of each color throughout the hat. I've also seen it knit up in Blue Sky Alpaca Organic Cotton (if you're on Ravelry you can see a photo here), Malabrigo Rios (Ravelry photo here), Debbie Bliss Andes Alpaca Silk (Ravelry photo here).

La Parisenne
I love the zigazaggy stripes of this one. the pattern calls for a yarn called SockPixie Sock yarn. The free knitting pattern for this beret can be downloaded here.It appears to be knit with an artisan dyed yarn that isn't available currently. I of course will go to one of my favorite yarns for striping, Noro Kureyon Sock Yarn or Noro Silk Garden Sock Green/Aqua/Brown.

Undergrowth Hat on Knitty
I love Knitty. But I even find it frustrating. Entering a search for "hat" brings up a list with no pictures. And of all the hats on the site, Undergrowth is the one I want to remember. (Download for Undergrowth Free Knit Hat Pattern is here.)  It calls for 1 skein in each of two colors of Brown Sheep Nature Spun Sport (colors pictured are #103 Deep Sea & #N003 Grey Heather.)


Lollipop Hat by Brittany Tyler
This is a fun hat that looks like it will be fun to knit. The instructions, available to download from the Tangled webzine, say it can be knit in up to 8 different colored stripes, making it a good project for using up leftover bits.

Tortora Hat on Knitty
Bobbles are one of my favorite stitches. Another Knitty option (free download for the knitting pattern is here), this knit hat mixes bobbles and stripes in an interesting way. It calls for 1 skein of Lana Grossa Alta Moda Alpaca Yarn and has versions for both a typical beanie and a slouchy toque.

Hatticus by Susanna Celso
A great cable pattern knit out of a bulky yarn, the Hatticus knit hat by Susanna Celso is available as a free download on Ravelry with notes on her blog. It's shown here in Cascade Magnum, requiring about 80 yards according to her notes.

Sunday, April 15, 2012

Free Slouchy Knit Hat Pattern

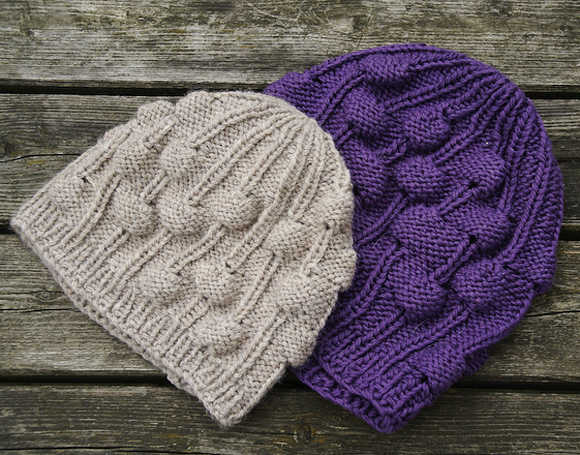
Thanks to some helpful comments on Ravelry I've updated my free Slouchy Hat Pattern. I hadn't looked at the pattern in years, and when I recently did the crown shaping instructions made absolutely no sense. Hopefully these improvements work....

I've updated it on Ravelry (download here if you're a Ravelry member) or you can print this page:


EASY SLOUCHY HAT


Twisted Sisters Jazz Handpaint, 1 skein each color 60 & 69

#6 Needles Double Pointed Needles

Gauge: 4” = 20 stitches and 24 rows

CO 96
For entire hat do 2 row stripes alternating colors 60 and 69.
Work 2 x 2 rib for 1 1/2”
Increase 8 stitches. (104 stitches)
Work stockinette until 9 1/2” from beginning.

Crown
On the next round (work 24 sts, k2tog) 4 times. [100 sts]
Work one round even.
Shape crown as described below.
Round 1: *Work 8, k2tog. Repeat from * around. [90 sts remain]
Round 2: Work even
Round 3: *Work 7, k2tog. Repeat from * around. [80 sts remain]
Round 4: Work even
Round 5: *Work 6, k2tog. Repeat from * around. [70 sts remain]
Round 6: Work even
Round 7: *Work 5, k2tog. Repeat from * around. [60 sts remain]
Round 8: Work even
Round 9: *Work 4, k2tog. Repeat from * around. [50 sts remain]
Round 10: Work even
Round 11: *Work 3, k2tog. Repeat from * around. [40 sts remain]
Round 12: Work even
Round 13: *Work 2, k2tog. Repeat from * around. [30 sts remain]
Round 14: Work even
Round 15: *Work 1, k2tog. Repeat from * around. [20 sts remain]
Round 16: Work even
Round 17: *K2tog. Repeat from * around. [10 sts remain]

Finishing
Cut yarn, leaving a generous tail. Draw tail through remaining stitches on the needle. Pull gently to close hole. Weave in tail. Weave in ends.

Updated 4/15/12


Tuesday, September 27, 2011

Free Knitting Pattern: Sari Silk Pillow on the Bias

Recycled Sari Silk Knit Pillow


Garter stitched squares are knit on the bias and sewn together to create this pillow cover. This is a great project for the beginner who’s ready for something a bit more challenging than a scarf. You’ll practice increasing and decreasing. And there’s so much going on with the yarn that your stitches don’t have to be perfectly even, and assembly is a breeze. No neat sewing required!

KNITTED MEASUREMENTS:
18” Square

MATERIALS:
18” pillow form
1 pair US 7 (4.5mm) needles

GAUGE:
16 sts and 14 rows to 4”/10cm

NOTES:
The recycled silk yarn is uneven in both size and color throughout the balls. I prefer to buy skeins (instead of balls) so that I can see the colors and control how the color plays out. If you can’t find skeins, you can either unwind the balls, or, just let the color come naturally and be surprised!

SQUARES:
Cast on 3 stitches.

Increasing:
Row 1 (Increase Row): Knit into front and back of first stitch. Knit to last stitch. Knit into front and back of last stitch.

Before turning work, place a safety pin on the first stitch of this row. The safety pin is placed so that you know when to increase. Whenever the pin is on the right-hand side of your work, you increase at each end.

Row 2: Knit across row

Repeat rows 1 and 2 until you have 47 st on the needle (edges should measure 9”.)

Knit across row.

Decreasing:
Decrease Row 1: K2tog, k to last 2 st, k2tog.

Decrease Row 2:Knit across row.

Repeat these tow rows until 3 st remain. Pull yarn through 3 stitches and knot.

Make a total of 8 squares.

ASSEMBLY & FINISHING:
Sew together 4 squares for front, and 4 for back.

Block to measurements.

Sew three sides together. Insert pillow, sew remaining side.


Monday, August 29, 2011

How to Figure How Many Granny Squares You Need For an Afghan


There are a number of things you need to keep in mind when figuring how many squares you'll need to make an afghan or blanket.


1. Make several squares in the pattern you've chosen.
2. Block and measure the squares. Blocking is especially important when assembling a blanket out of squares. It's one of the few times I actually block my work. The time and headache saved in assembly more than makes up for what you spend blocking. I have photos and written instructions on the process I follow here.
3. Decide how you're going to assemble your squares. The assembly method you choose will affect the finished size of your blanket. Whipstitching or single crocheting the blocks together won't afect the size much. But joining with a decorative stitch can affect the outcome. Even just a 1/4" added on a join can add 4 - 5" to the overall size of a king blanket using 4" squares. So if you're choosing something fancy like that you're going to have to piece a few together to figure out what the size is of your blocked, assembled square.
4. Divide the length and width of the blanket you want to make by the size of your finished squares (including whatever you added for assembly). This probably won't be a round number, so you'll have to decide whether you want to round up and make a slightly larger blanket, or round down & make a slightly smaller blanket. (Keep in mind that if you round down you can add a decorative border.) Then multiply the number of squares you need across by the number of squares you need for the length and you'll have the total number of squares you'll need to make. 

Friday, August 12, 2011

Knit and Crochet for Charity

When I find myself with extra time and leftover scraps of yarn on my hands I like to find groups that distribute hand made items to people in need. Online searches for these groups have been time consuming, not always easy to find, and often outdated, so I'll keep track of what I learn here, and update it as I learn more. If you have a group or project to share, please leave a note for me in the comments section and I'll add your info.

Projects with Specific Due Dates:

Martingale & Co is sponsoring a campaign called "Share the Warmth". They're not collecting items themselves, but to encourage people to knit, crochet & quilt for charity they're offering prizes to people who donate items to the group of their choice & then submit photos to Martingale. The random drawings will be held Thursday, December 1, 2011, or when the tally reaches 3,500 donations, whichever comes first. Here's a link with all the details. You can send pictures of your donations to: Sharethewarmth@martingale-pub.com or kburns@martingale-pub.com


Smooth Fox Crochet is sponsoring a 2011 Winter Charity Square Drive with prizes. They're looking for 6, 7 or 12" squares. Check the link for complete details. Deadline is January 14, 2011.


Create scarves to gift to the athletes, coaches, families, volunteers and supporters of each participating Special Olympics Program. at the 2011 Special Olympics. They're accepting scarves made out of specific yarns:
Red Heart Super Saver 387-Soft Navy
Red Heart Super Saver 319-Cherry Red
Red Heart Soft 4604-Navy
Red Heart Soft 9925-Really Red
The colors as well as the size (6" x 54"-60") of the scarves will be the same for all participating Programs in the 2012 Special Olympics USA Scarf Project. They have 4 free patterns on the site, although they welcome any design. Individual states have organized distribution of the scarves, with a list of shipping addresses and due dates here. Due dates vary by state, and fall between Dec. 12, 2011 to Mar. 5, 2012. The yarn was available today at my local Joann's (and on sale even!) but you can also order online directly from Red Heart at a discount. You can post photos of your finished work, and see what others have made, on their facebook page.


Groups That  Continually Accept Items  


Shanghai Guild has a special place in my heart as I was lucky enough to join  in their weekly knit-ins during my time as a trailing spouse in Shanghai. They make assemble beautiful blankets that are distributed to orphanages in China; create dresses for stuffed bears that are sold to benefit young heart patients and make scarves, hats and other gifts for elderly residents of Shanghai. They're happy to accept 10" knitted or crocheted squares and have people in many countries that collect items and get them to Shanghai.


Knit4Charities Inc. is an Australian Internet based association of dedicated knitters and crocheters who give warm clothing and comforting items such as blankets and toys to needy people throughout our Country. 
They have a huge following and ongoing projects that serve a variety of charities.


In memory of their sister, two women have launched "Kaps for Kendall."
From their site: "Our goal is to raise money to fight Fanconi anemia, the disease that took the life of our sister, and to provide special hats for kids and adults, who have lost their hair from chemotherapy and radiation.


If you have a group or know of one, leave info in the comments section and I'll add you to this list."

Saturday, May 29, 2010

Freeform Crochet Fun & Frivolity Crochet-a-Long

In April 2010 a group on Ravelry started a Crochet-a-Long with weekly instructions submitted by different designers. I'd participated in a similar project earlier in the year & thought it was a great way to go about crocheting. I completed the first four weeks. Then, as I was packing up to leave Shanghai for the summer it was just too much to fit in my suitcase. So I washed it, cut it up, felted it and cut it up some more and ended up using the pieces in a bag.

Following are the instructions as they appeared on the Ravelry site and pictures of what I did. My notes are in blue.

Thursday, May 20, 2010

How to do a Jogless Join When Knitting in the Round

I can never remember how to do this, or find the instructions when I'm looking for them. Here are notes I copied up from a project I can't now find on Knitty. (Yes, the primary purpose of this blog is to get me organized in some sort of fashion...)


You may want to do the famous "jogless join" to avoid that little "step" that happens when you switch colors while working in the round. To do this, work one round in the new color. On the first stitch of the second round, pull the stitch below that first stitch (in the old color) up onto the left needle and knit it together with the stitch in the new color. Keep knitting in the new color. Lovely.

Monday, January 18, 2010

Noro Kureyon Striped Scarf


Finally finished this Noro stripe scarf. I've had the how-to notes scribbled on a scrap of paper on my desk that I uncovered during my end of year cleaning. It came from a 2007 post on the Brooklyntweed blog.


When I finally got around to it, it couldn't have been quicker or easier. And it's far more interesting & complicated looking than it actually is.


I used 2 skeins of Noro Kureyon - one each in color 90 & 220.


Instructions:
Using US7 needles I cast on 39 stitches using cable cast on. To keep the edges neat & tidy I slipped the first stitch of each row as if to purl. I worked 1 x 1 rib until I didn't have any yarn left. Ended up being 7" by about 75". A great length and just the right width to length proportion.


I finished a second scarf using the same technique - this time in Noro Silk Garden, colors 279 & 267.

Monday, March 3, 2008

Garter Stripe Baby Blanket

Garter Stripe Baby Blanket


Plymouth Encore DK: 1 skein each of 13 colors*
Size 5 circular needle.


I used the "Kiss My Shadow" online stripe generator to come up with the pattern, limited to 1, 2 or 3 row stripe widths. It's a fun toy to play around with - I did it quite a few times until I found a version I liked.


From there its was easy:


Cast on 140.


Knit in garter stitch following stripe pattern to desired length. Mine ended up being 30" wide by 36" long.

I'm not a big fan of acrylic, but I know moms like it because it's machine washable, and I was looking for something that came in a lot of colors and was relatively inexpensive. The Encore, at 75% acrylic & 25% wool wasn't quite as soft & cuddly as pure wool would be - but it was considerable cheaper and should be easy to care for. The color selection is fantastic. I chose strong bright colors - but it also comes in baby pastels.


The benefit of the garter stitch stripe is that the blanket is interesting from both sides.


*13 colors I used: 4379 (Celery). 1304 (Seafoam) . 999 (Burgundy). 848 (Navy). 9601 (Red). 1382 (Yellow).217 (Black). 515 (Wedgewood Blue). 233 (Lavender). 1384 (Purple). 1385 (Hot Pink). 1383 (Orange). 1317 (Teal)

Tuesday, February 19, 2008

Stockinette Pleats Pattern


Piece #1 of the Black Sweater Coat project

The first piece is a little over 2" wide & has a good firm structure. It's made with "Love" by Southwest Trading Company - a blend of Bamboo & Silk that's wonderful to work with. It's smooth and soft, but not annoyingly slippery like some silks can be.


Following are the knitting instructions I developed for this stitch:


Stockinette Pleats
Yarn:
Southwest Trading Company "Love"
Needle:
Size US3 Double Pointed - use 3 needles
Finished Size:
width: 2.25" wide. length: not known as yet

Hints:

Keep a crochet hook handy. It's easy to drop stitches as you move them. The crochet hook lets you scoop them back up quickly. I also counted stitches on both needles at the end of the "transfer" as this was a good opportunity to drop stitches and not notice. Counting at this point lets you figure out when you've slipped a stitch before it becomes a hassle to go back.
You should have 13 stitches on the front needle & 11 on the back.

Having tried this quite a few times, I feel that it looks best when worked tighter than usual. You have a better structure, the rib stitches blend nicely with the stockinette pleats and the pleats stand up nicely & can be seen more clearly. For example - the suggested needle size for this yarn for is US7 and I preferred the results using a US3.


  • CO 24 stitches. K1, P1 rib for 4 rows, slipping the first K stitch of each row.
  • Divide stitches onto 2 needles: 1. Pick up first stitch (a knit stitch) and slip it on a needle in front of the work. 2. Pick up second stitch (a purl stitch) and slip it on a needle at back of the work.
  • Continue like this until you come to the last 2 stitches. Slip them both onto the front needle.
  • Work stockinette stitch for 8 rows, slipping the first K stitch of each row K-wise.
  • K1 from the front needle, then P1 from the back needle across row. Last 2 stitches are on the front needle - K the first one, P the second one.
  • Work 7 more rows in K1, P1 rib, slipping the first K stitch of each row. (8 rows total)
  • Divide stitches as before & continue in pattern until you've reached the desired length.


Let me know what you think. If you try this pattern and have questions or suggestions, please leave them in the comments section. And if you use this pattern to make something email me a photo - I'll add it here & link to your blog or website!